I started building a 1:3 size Dalek a couple weeks ago, and while I haven't gotten too far yet, I thought I would record my steps here so far.
I am building an Ironside, so I am using these plans (opens a large pdf), which are just the plans for the 2005 Dalek design.
To scale down to 1:3, I simply divide every measurement by 3. The plans are meant for wood and other sturdy, thick materials, so I have made modifications to be able to use only cardboard and paperboard as much as possible.
I decided to start by building the base ("bumper"). My friend and I cut all of the slats out of paper board (cereal boxes). It's important to label each one according to the plans, and to label left and right. The plan gives a set for the right side, so you have to draw them backwards for the left side.
After this, I built the flat part on top of the bumper that's between the slanted slats and the "skirt". I had to cut it out in four parts because it was so big. I then mounted it on a piece of corrugated cardboard for stability. The bottom of the skirt will sit against the inner edge of the paper board.
To build the bumper, I started by cutting out 22 wedges like so:
The left edge is the height of the vertical edge of the bumper (3cm in this case). The horizontal pen line is half of that (1.5 cm) and the vertical pen line is slightly longer (1.8 cm in this case). What's important is the angle of the hypotenuse, as that is the angle at which the angled slats will rest, and it must be correct for them to match up together around the bumper. Then 3mm were cut from the top to allow for the corrugated cardboard of the previous step to rest in there.
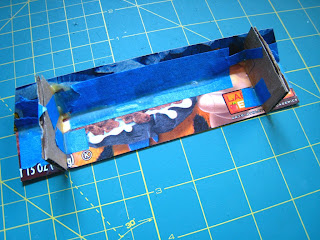
The next step is the glue the support pieces to the angled slats. I used painters tape to tape the hypotenuse of the triangle to the slat so that the corner meeting the long (3cm) side is flush against the bottom of the slat. The 3mm space is on the top. Once it is taped in place, I used wood glue to strengthen it. I used a right edge and another box to check that the support piece was straight up.
Each slat needs two support pieces, so once I had them both secured on at least one side with dry glue, I attached the vertical slat with more tape and glue:
Once it is dried, it looks like like this:
And that's how far I've gotten so far!
Subscribe to:
Post Comments (Atom)


0 comments:
Post a Comment